
................................................................................................................................................................
How to Clean and Maintain a Well Pressure Tank
By Tim Bossie
Reviewed by Dawn Hammon
What You'll Need
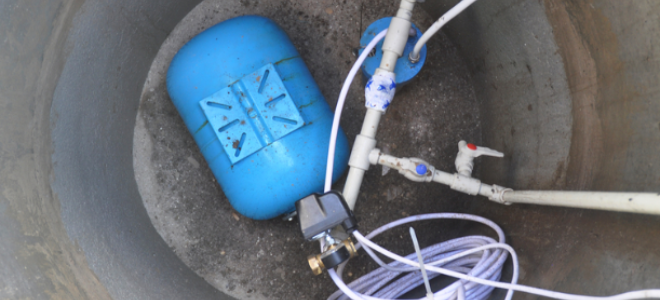
In order to keep adequate pressure in a
home with well water, a well pressure tank is used.
This well pressure tank is situated on the
outside of the pump and stores water that is under pressure.
When a faucet is turned in the home, the water
is then pushed into the pipes because of the pressure that is built up.
Like most mechanical items, the well pressure
tank does need to be cleaned and maintained on a regular basis.
Here are some steps to take to complete this
project yourself.
Step 1 - Turn off
Power to Well Pressure Tank
Before doing any type of work to the well
pressure tank, it is important to make sure that the power is turned off. This
should be done at the breaker box.
Once you turn the breaker off, test the tank
to make sure there isn't any power.
Also, leave a note attached to the breaker
letting others know that you are working on that item.
Step 2 - Drain Water
from Tank
Attach the garden hose to the drain at the
bottom of the tank. It is usually located on the bottom edge of the tank.
Simply attach the hose to the drain by
screwing it onto the faucet-like outlet.
With the hose on the drain and the other end
leading into a bucket or out a door, open the valve. The water should begin to
immediately drain from the tank.
Step 3 - Remove Air
Regulator
Located at the top of your well pressure tank
is the air regulator that shows how much pressure is in the tank.
This can be removed with the use of a pair of
adjustable pliers. Carefully remove it so that you do not damage it.
Step 4 - Remove Access
Hatch
Located on the top of the pressure tank are a
few screws that hold the access panel to the pressure tank.
Loosen these screws and remove them. Lift
the access hatch away from the tank and shine
a flashlight into the tank.
Step 5 - Wipe Out
Build Up
Anything with water is going to have some type
of calcium build up within the internal workings of it.
Wipe out the inside of the well pressure tank
with a rag. If you cannot remove some of the build-ups, use a piece of steel
wool.
Scrub the calcium deposits off the pressure
tank and pipes.
Step 6 - Replace
Access Hatch
Set the access hatchback onto the well
pressure tank and tighten it down with the screws.
Step 7 - Replace Air
Regulator
If the regulator looks like it is not working
correctly, test it with an air pressure tester. If needed, replace it with a
new one.
Wrap some plumber's teflon tape around the threads and screw
into the housing. Tighten it down with the pliers.
Step 8 - Check
Condition of Pipes
Use a flashlight and look closely at the
condition of the pipes going into the well pressure tank and out from it.
Check for any signs of cracking or leaks. If
you notice any, then repair the pipes with new sections or a clamp.
Turn on the breaker and let the pump fill up
with water and air pressure.
Tim Bossie is a contributing writer for DoItYourself.com. He is a
seasoned web writer and researcher with experience working on a wide range of
home improvement issues, and especially enjoys learning about plumbing, car
repair, and door construction.
Dawn Hammon has thrived in freelance writing and editor roles for
nearly a decade. She has lived, worked, and attended school in Oregon for many
years. Dawn currently spends her days convincing her children she is still
smarter than them while creating new experiences with her husband of 24
years.
Her multiple interests have
led her to frequently undergo home improvement projects. She enjoys sharing the
hard-earned knowledge that comes with it with the audience of DoItYourself.com.
Dawn and her sister make up a power-tool loving duo that teaches classes to
local women with the goal of empowering them to tackle their fears and become
comfortable with power tools.
Tapping into her enthusiasm
for saving money and devotion to sustainable practices, Dawn has recently
launched a passion project aimed at connecting eco-friendly products and
socially-responsible companies with consumers interested in making
conscientious purchases, better informing themselves about products on the
market, and taking a stand in favor of helping to save the planet.
When she is not providing
stellar online content for local, national, and international businesses or
trolling the internet for organic cotton clothing, you might find her
backpacking nearby hills and valleys, traveling to remote parts of the globe,
or expanding her vocabulary in a competitive game of Scrabble.
My Website: https://passionforwords.org/
No comments:
Post a Comment